
Monster usually appears on cartoon films and seldom show up in real pictures. To your children, it would be great idea to draw a monster on their real pictures. In this tutorial, it will show you techniques to draw a 3D monster on a real picture in an easy way.
Step 1
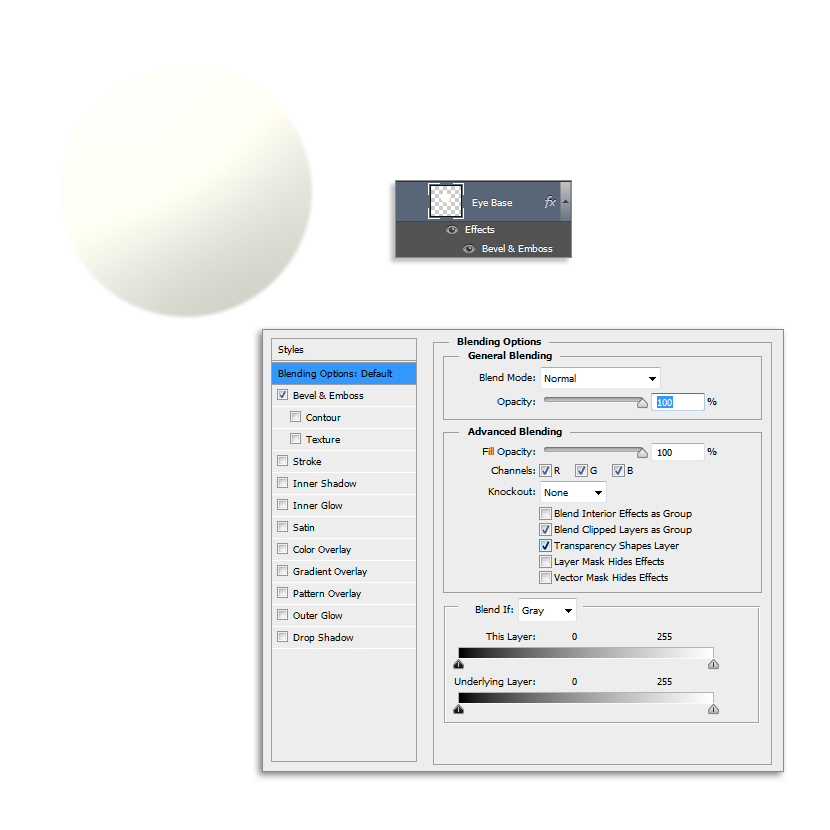
First, we are going to start with the eyes, using the Elliptical Marquee Tool (M), make a circular selection, hold the Shift key pressed while drag the circle to keep it proportional. With the Paint Bucket Tool (G), fill the selection with white color, next, apply a Bevel and Emboss Layer Style with the following settings.
Step 2
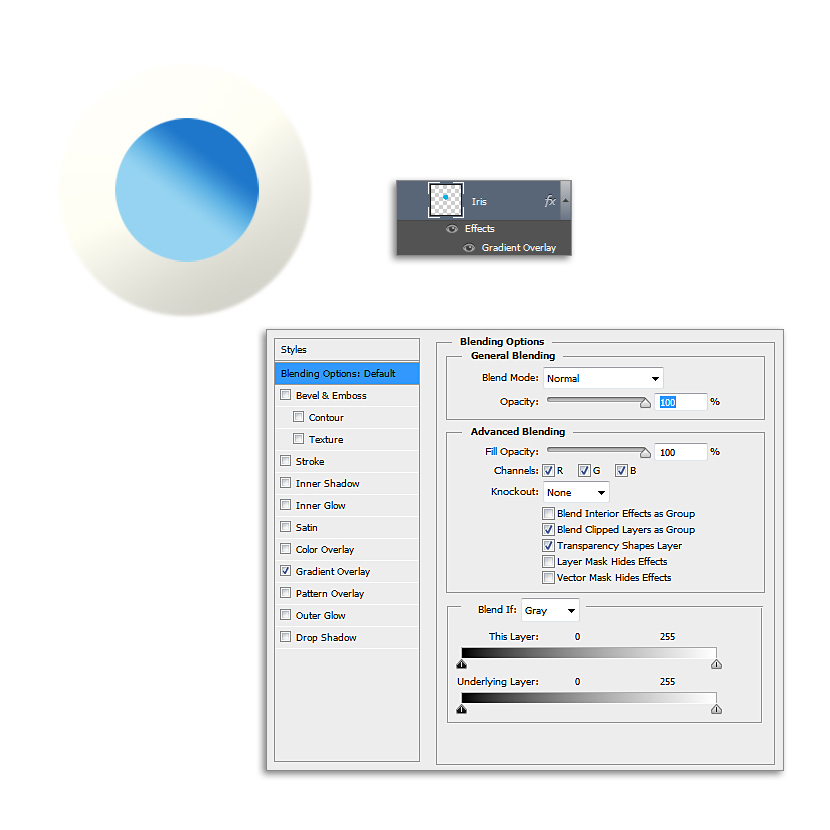
Now, create a new Layer over the previous one, for the iris, use the Elliptical Marquee Tool (M) and place it in the middle of the eye, next, using the Paint Bucket Tool (G) fill it with light blue color. Apply a Gradient Overlay Layer Style with the following settings.
Step 3
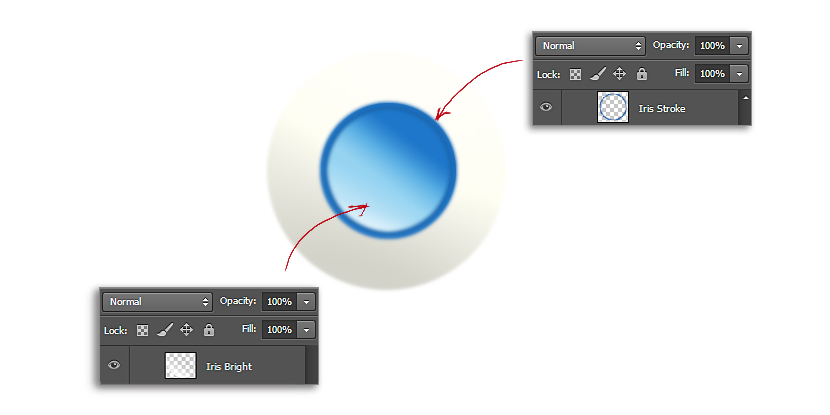
Make Ctrl + Left Click on the Iris Layer, to select the iris shape, now go to Edit > Stroke and make a 2 pixels blue stroke around it on a new Layer “Iris Stroke”, the blue color we used before will work. To add depth on the iris, create a new Layer “Iris Bright”, and using the Gradient Tool, make a white gradient as shown.
Step 4
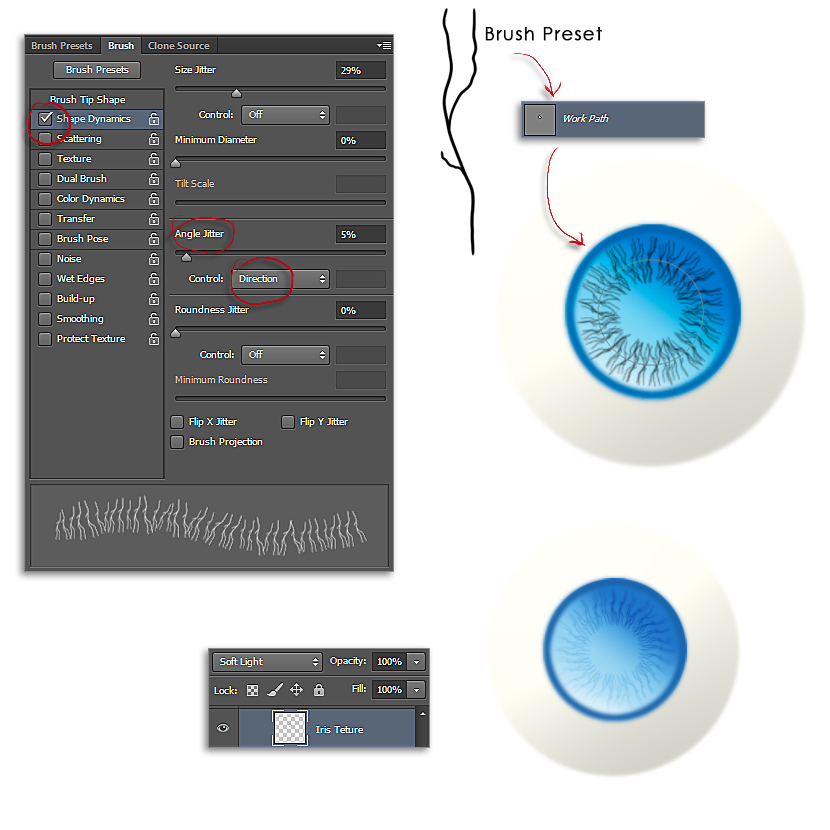
For the iris texture we are going to create a custom brush. With the Brush Tool (B), on a new Layer, draw a form more or less as shown, next, Ctrl+ Left Click on that Layer, to select its content, then go to Edit > Create Brush, now, we have our custom brush on the Brush Presets menu. Go to the Brush Presets palette (F5), and on the Brush tab, adjust settings as shown. Create a new Layer, “Iris Texture”,set its Blending Mode to Soft Light and 100% Opacity, and with the Ellipse Tool (U) make a circle, smaller than the iris size, now stroke the Path with the custom brush selected, then, you will get a radial iris texture.
Step 5
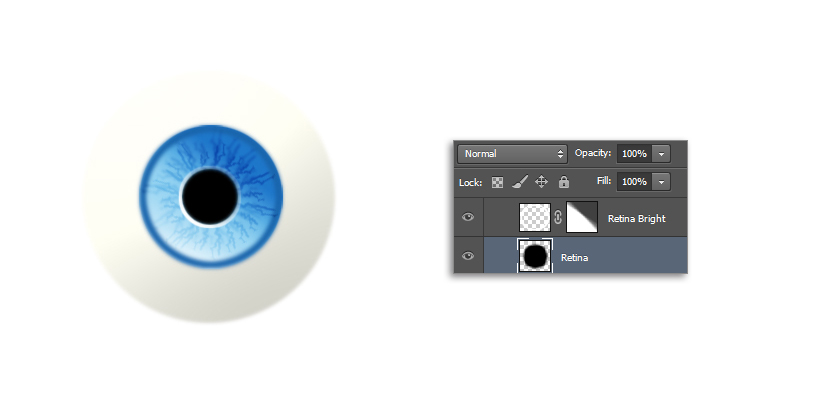
On a new Layer “Retina”, let’s make the retina, use the Elliptical Marquee Tool (M) to create a circular selection, next, fill it with black color. Create a new Layer “Retina Bright”, set its Blending Mode to Mormal and 100% Opacity, with the same selection process we used before, make a white stroke around it. To fade off the upper-right area, create a Layer Mask and make a gradient as shown.
Step 6
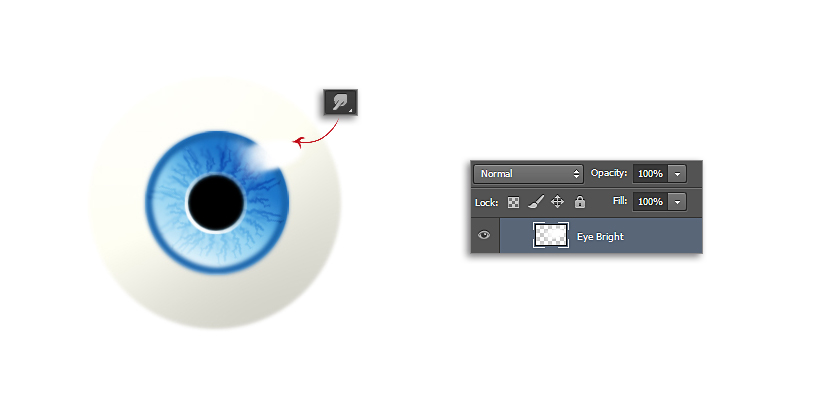
To finish with the eye, create a new Layer “Eye Bright”, and with the Brush Tool, and a Soften Round Brush selected, paint a white stroke on the upper-right area, next, pick the Smudge Tool and dissolve its edges. Once all the eye’s Layers are completed, merge them together to get only one.
Step 7
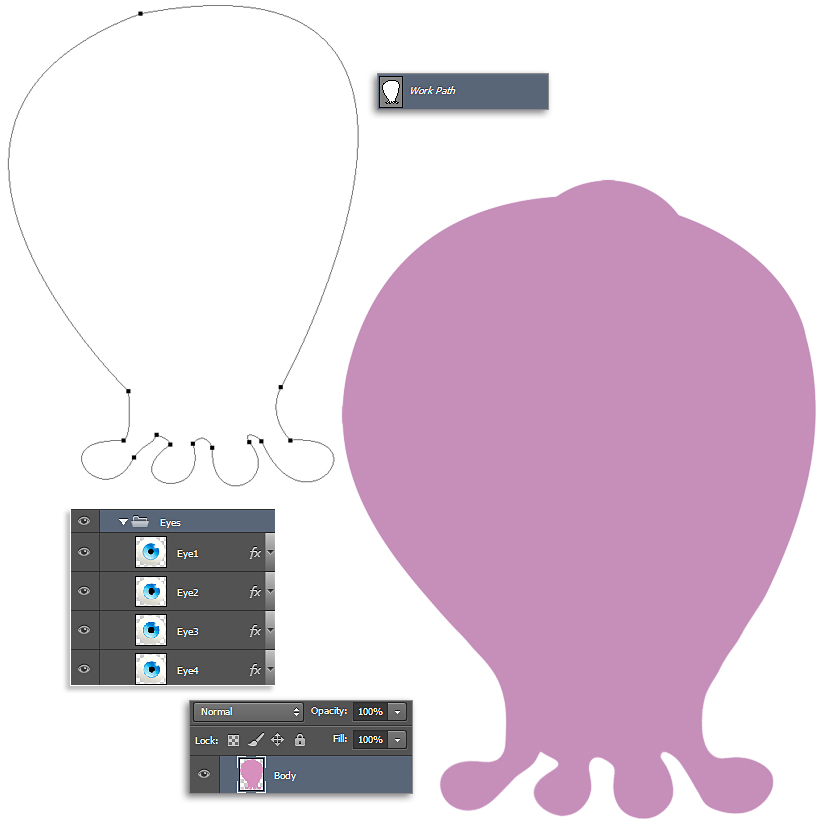
Now, let’s get started with the body. Using the Pen Tool (P), create a Path to define the body’s shape, once you are happy with it, create a new Layer “Body”, and Fill Path with pink color. Next, duplicate the eye’s Layer three times and place them on the desired place, resize each one to get a better result, you can also organize all in a folder to keep them organized.
Step 8
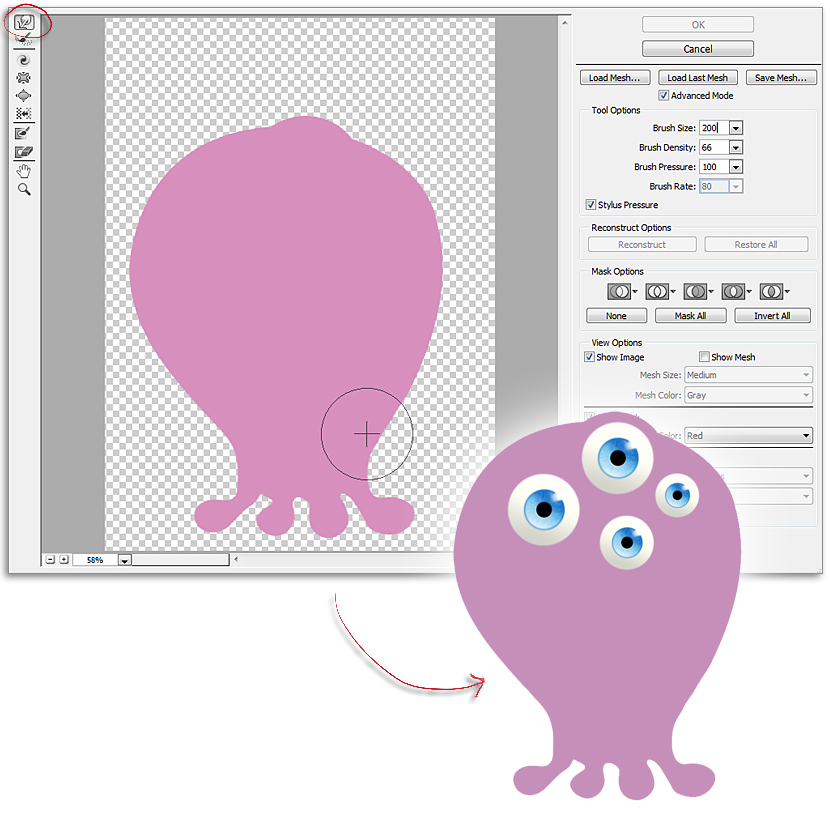
To adjust and refine the shape go to Filters > Liquify, using the Forward Warp Tool (W), make the necessary corrections, as the upper eyebrow.
Step 9
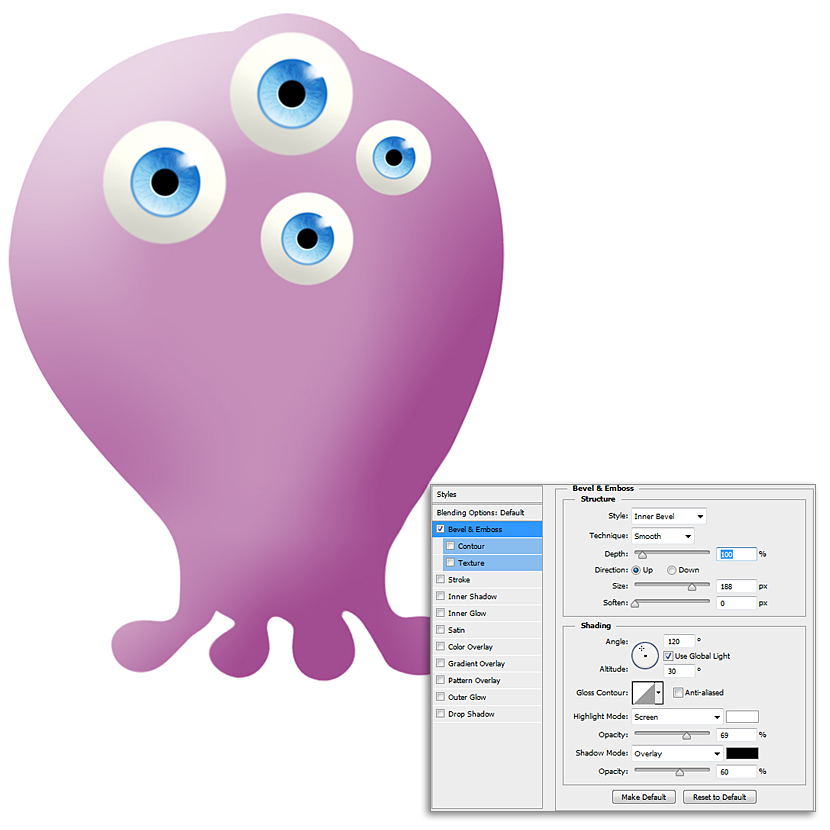
On the “Body” Layer, apply a Bevel and Emboss Layer Style with the following settings to get the body’s volume.
Step 10
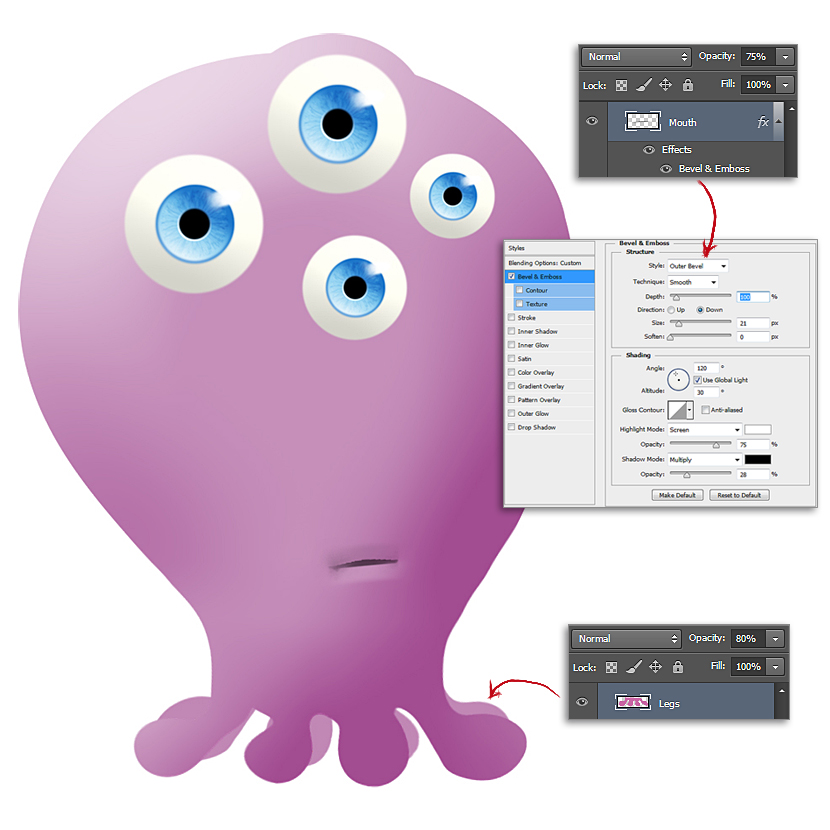
For the mouth, create a new layer “Mouth”, set its Blending Mode to Normal and 75% Opacity, pick the Brush Tool (B) with a Round Brush selected, and paint the mouth with black color, next apply a Bevel and Emboss Layer Style with the following settings. To create the back legs, use the Rectangle Marquee Tool (M) to select the legs and Copy and Paste it on a new Layer, next go to Edit > Transform > Flip Horizontal, finally adjust the Layer Opacity to 80%, so they appear more distant.
Step 11
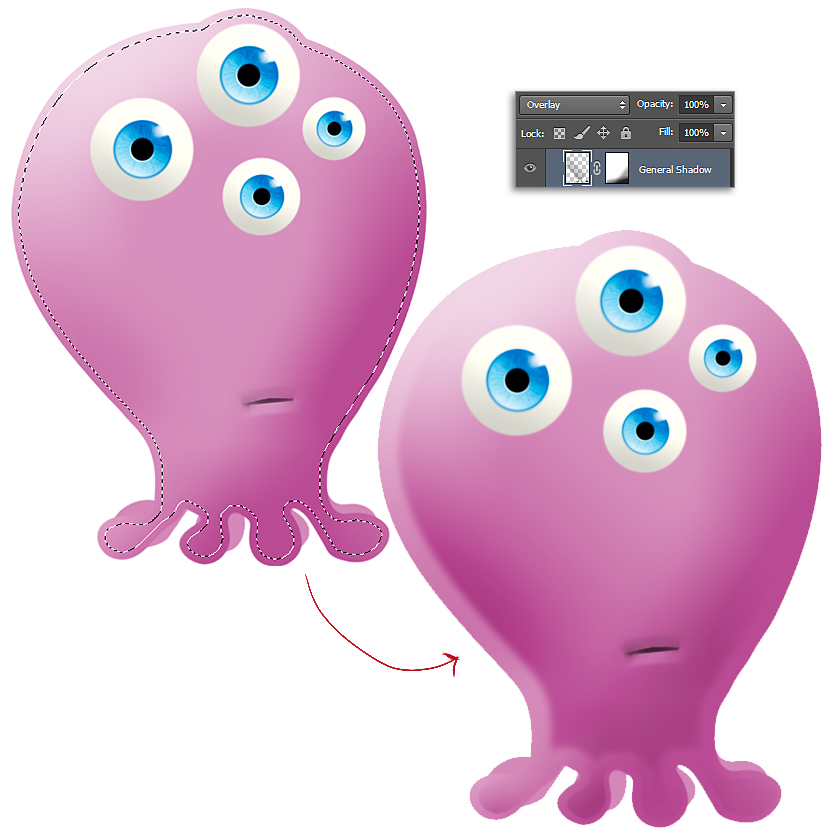
Create a new Layer ” General Shadow”, set its Blending Mode to Overlay and 100 Opacity, next, select the body’s shape ( Ctrl + Left Clcik) and go to Selection > Transform Selection > Contract, and apply a 6px transformation. With the Gradient Tool (G), make a black to transparent gradient, from bottom to up-right as shown. Create a Layer Mask to hide the undesired gradient’s areas.
Step 12
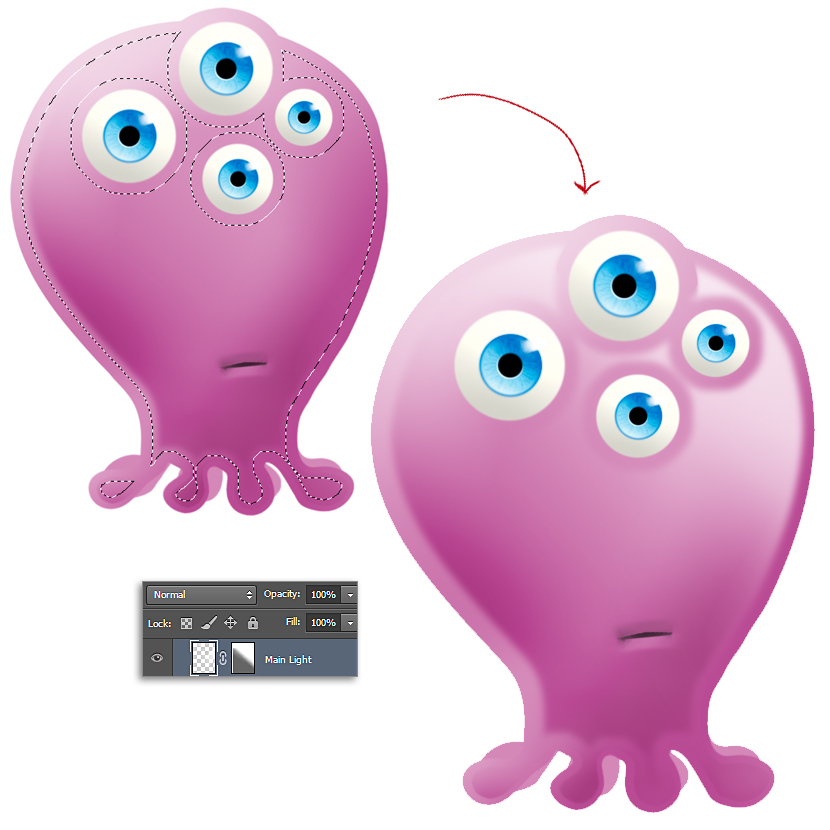
Create a new Layer, “Main Light”, set its Blending Mode to Mormal and 100% Opacity, then repeat same body’s selection as the previous step, but now subtracting the eyes shapes, like this, once the selection is active, press Ctrl + Alt + Left Click, on each eye Layer. Go to Selection > Transform Selection > Contract, and apply a 12px transformation. On the new “Main Light” Layer, use the Gradient Tool (G) to apply a white to transparent gradient from upper-right downwards as shown. Again, use a Layer Mask to hide the undesired gradient areas.
Step 13
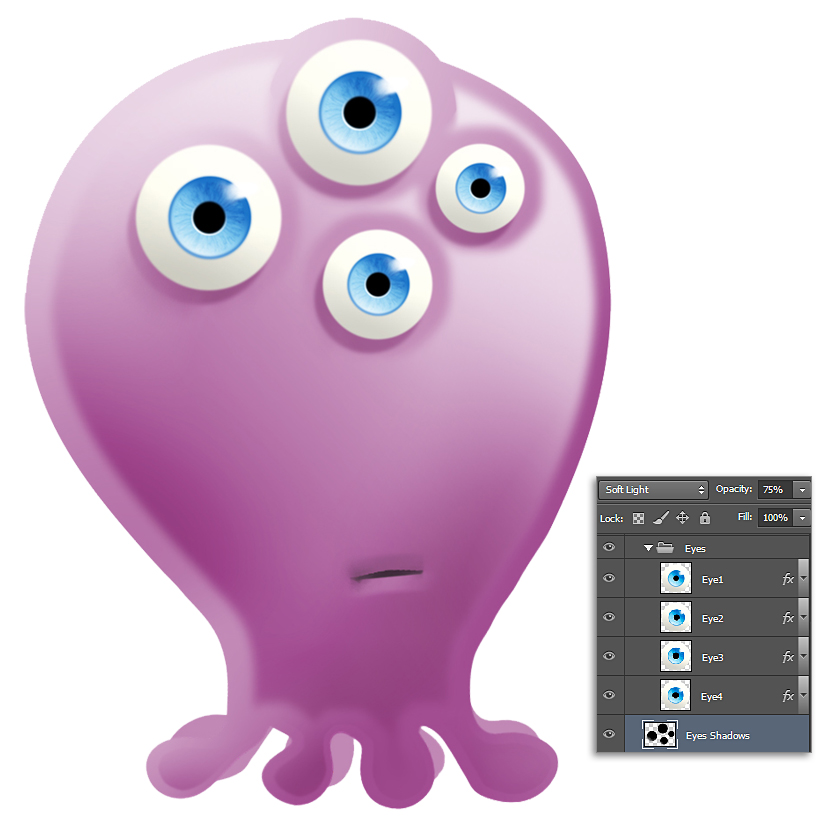
Create a new Layer “Eyes Shadows” underneath the eyes folder, set its Blending Mode to Soft Light, and 75% Opacity. Make a selection of all the eyes, use de Selection Tool (M) to relocate it a bit left-downwards and fill it with black color. Finally use the Blur Tool to blur the edges a bit.
Step 14
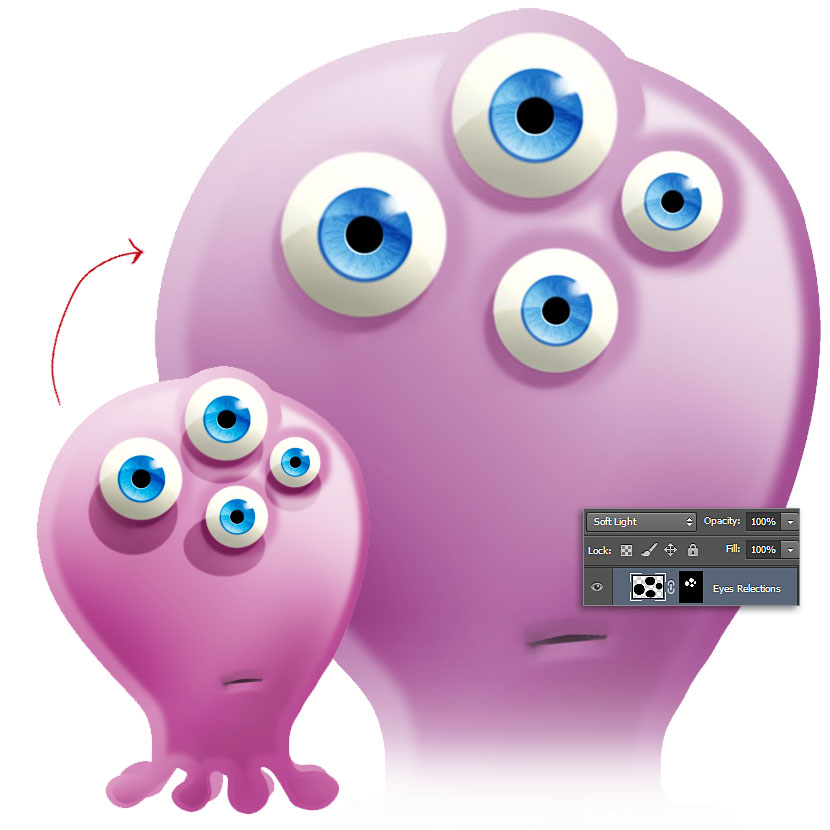
Now, let’s make the eye’s reflections, create a new Layer ” Eyes Reflections” set its Blending Mode to Softlight and 100% Opacity. Usind the Elliptical Marquee Tool (M) make the following selections, next, with the Paint Bucket Tool (G), fill them with black color.
Step 15
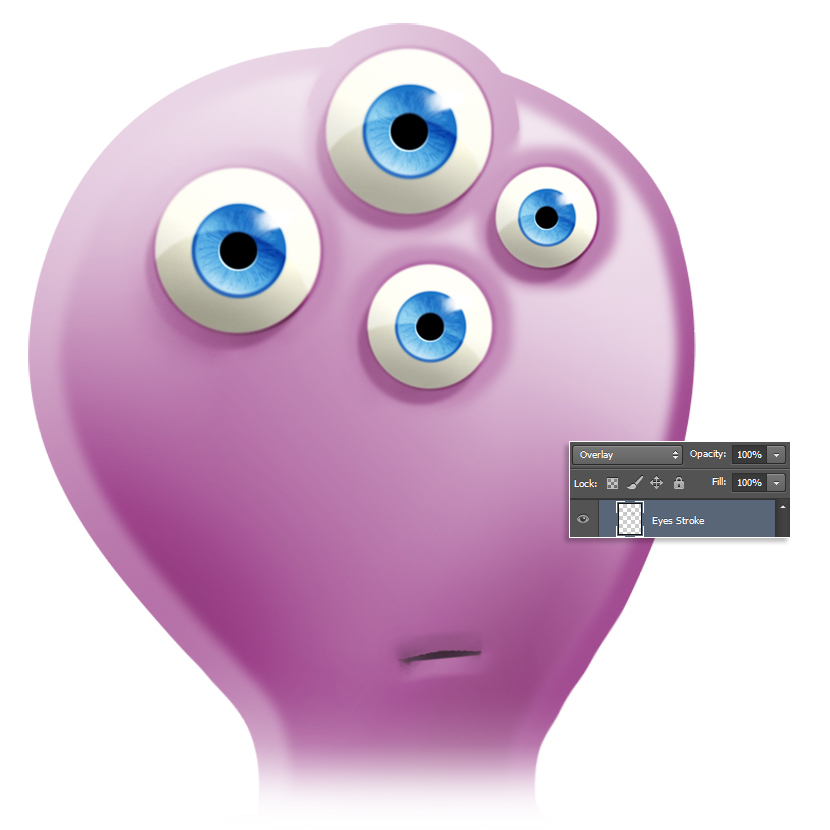
Next, to highlight a bit the eyes, create a new Layer “Eyes Strokes” set its Blending Mode to Overlay and leave Opacity to 100%. To select the eyes contours, make Ctrl + Left Click, holding the Shift key pressed, over each eye layer, next, go to Edit > Stroke and make a 2 pixels stroke, with black Color, and Outside selected. With the Blur Tool, blur them a bit.
Step 16
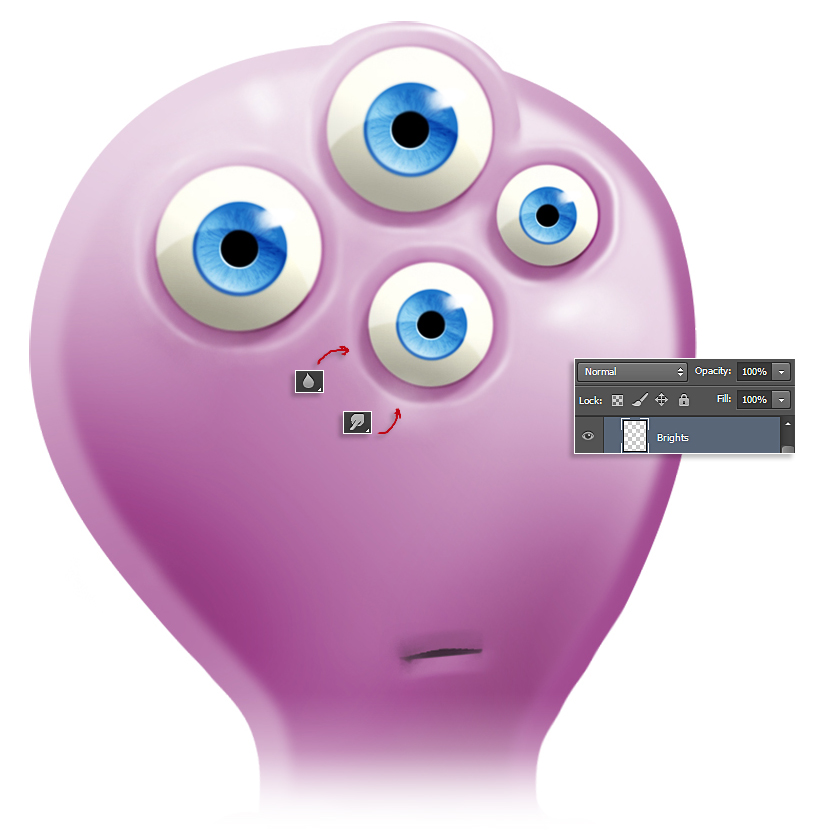
Create a new Layer “Brights”, set its Blending Mode to Normal and 100% Opacity, and with a Soft Round Brush, paint the eyebrows lights, following with the Smudge and Blur Tools to mix them with the body’s surface.
Step 17
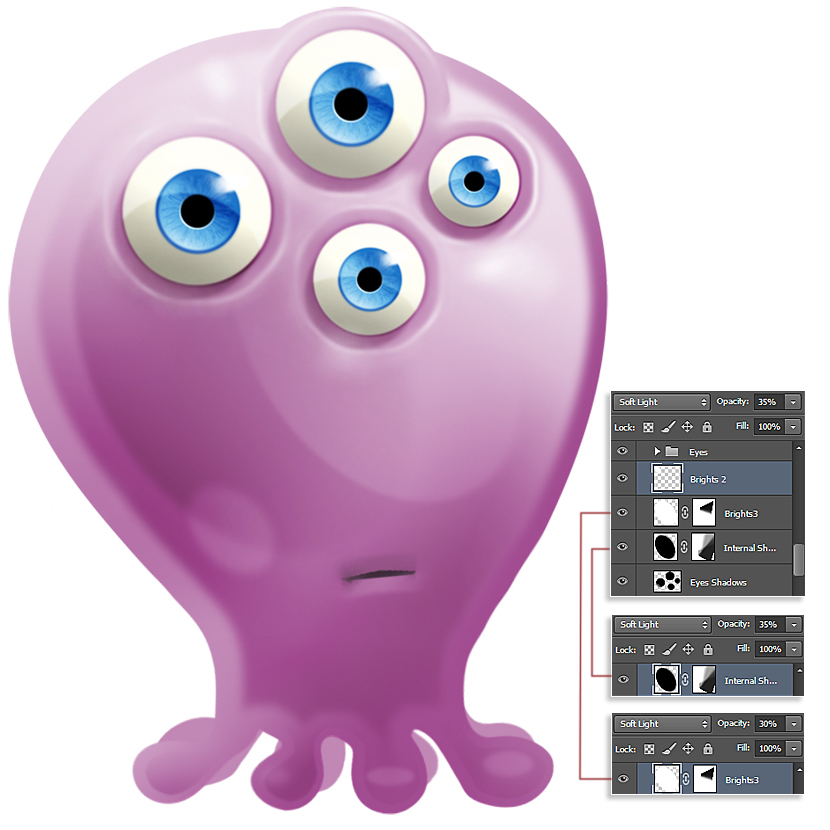
Following with the lights, let’s create three layers, first one “Brights 2”, set is Blending Mode to Soft Light and 35% Opacity. With the Elliptical Marquee Tool (M), make an small elliptical selection, and with the Paint Bucket Tool (G), fill it with white color. Next, with the Blur Tool, blur it a bit. On the next layer “Brights 3”, set its Blending Mode to Soft Light and 30% Opacity, and repeat same operation as on the previous layer, but this time with a bigger elliptical selection, and placed where shown. Finally, the third one, “Internal Shadow” set its Blending Mode to Soft Light and 35% Opacity, but this time filled with black color and placed where shown. Notice that, the last two layers have Layers Masks, I did that for hide some portions of the shapes.
Step 18
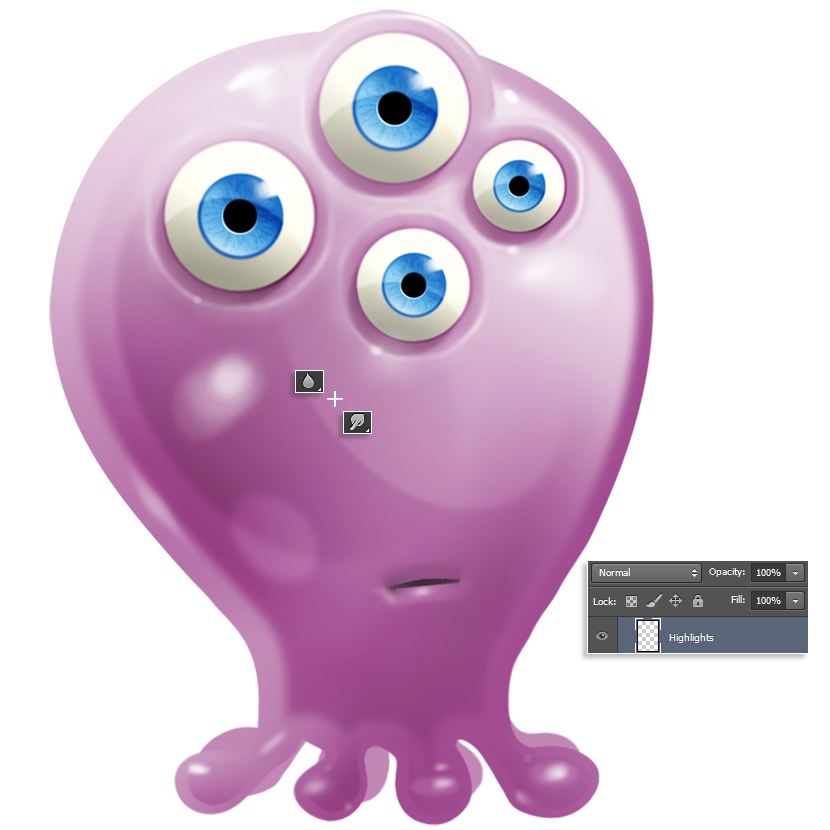
To finish with the lights, create a new Layer “Highlights”, and with a Soft Round Brush, paint some strokes and dots to enhance areas where light has more relevance. Use the Blur and Smudge Tools to blend the strokes with the surface.
Step 19
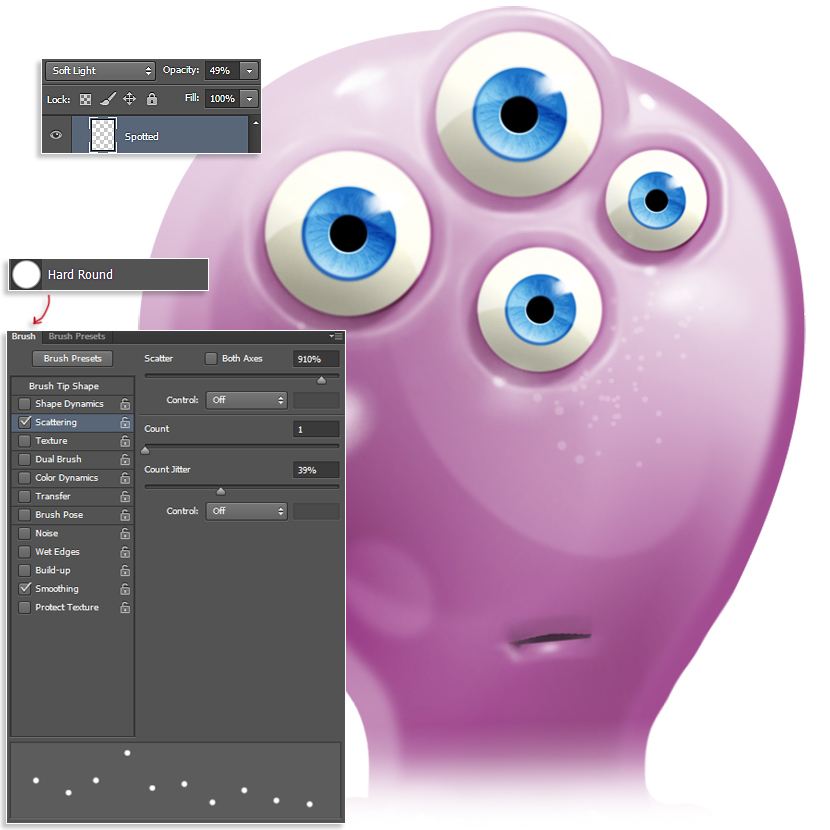
Now let’s create a spotted texture on our character. Select the Hard Round Brush on the Brush Palette, now, on the brush settings (F5) , set it as shown. With it, the brush stroke will be as irregular dots, that will give us the desired result. Create a New Layer “Spotted” set its Blending Mode to Soft Light and 49% Opacity, pick white color and paint some dots where shown.
Step 20
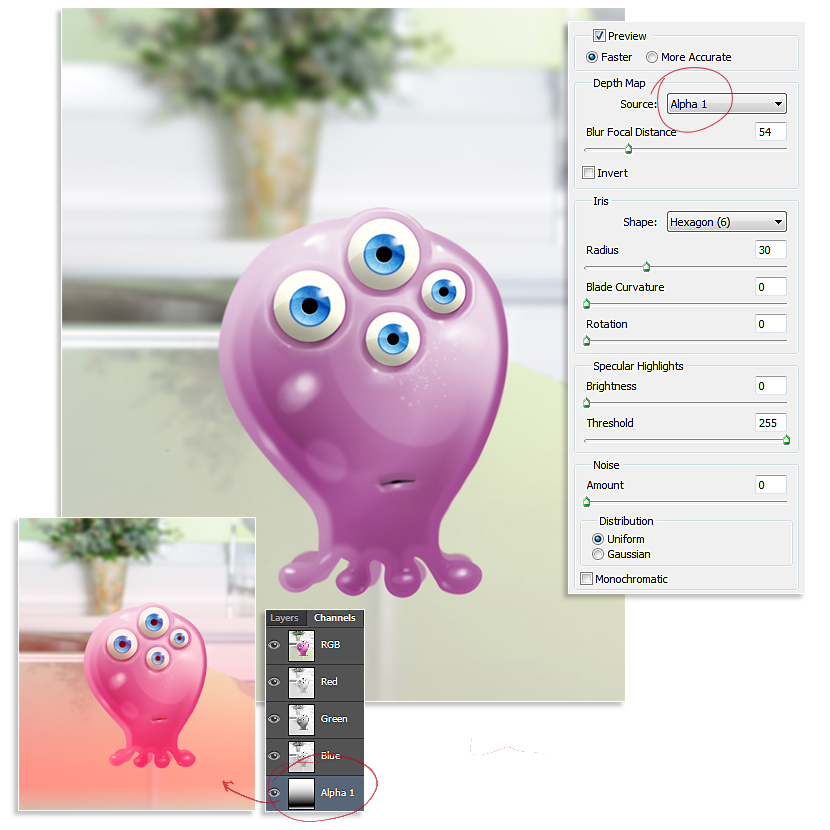
The character is finished, it’s time to start with the background. Organize all previous layers under the same Group Folder, duplicate the resultant folder and Merge Group, so now we have the whole character on a single layer. Open the background image and place it under the character layer as shown (or as you prefer), now go to the Channels Tab and create a new one (Alpha 1 by default), pick the Gradient Tool (G), and with white color make a gradient from top to down that covers 3/4 of the channel, and aN small one from bottom to up, on the channel’s lower part. Select again the RGB Channel and come back to the Layers Tab. Select the background layer and go to Filters > Blur > Lens Blur, select the Alpha 1 channel on the Depth Map Source selector, and apply the following settings. Now we have our background image with a depth of field blur, that gives scale and depth to our image.
Step 21
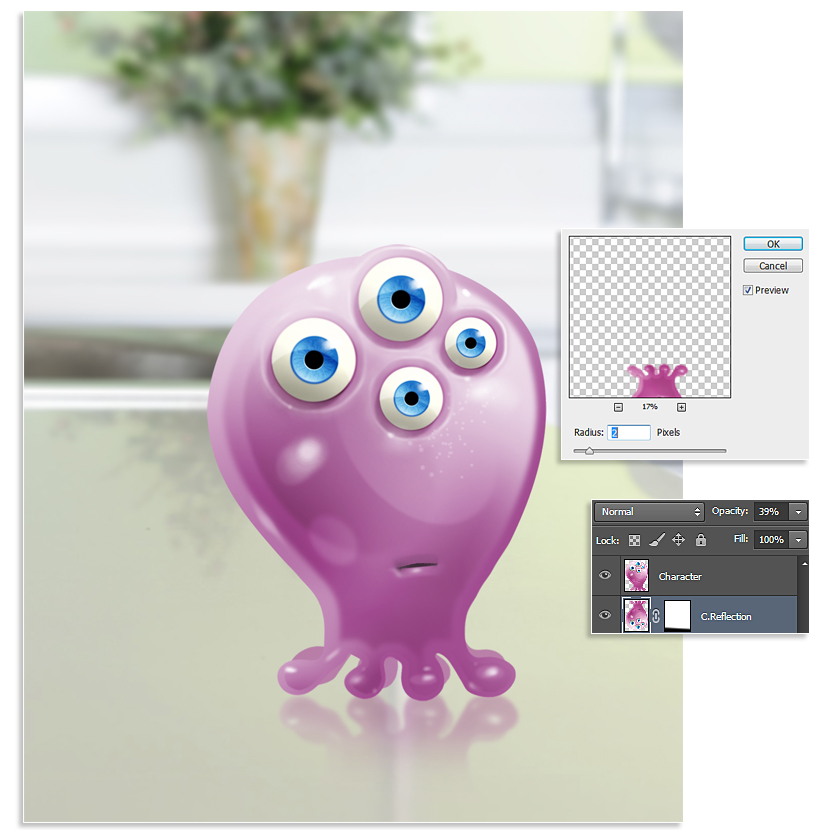
To create the character’s reflection, duplicate the character’s layer, set its Blending Mode to Normal and 39% Opacity. Now go to Edit > Transform > Flip Vertical and place it just below of the character as shown. Next, go to Filters > Blur > Gaussian Blur, and apply a 2 pixels radius blur. Finally, create a Layer Mask, and with the Gradient Tool (G) hide the head and midbody of the character.
Step 22
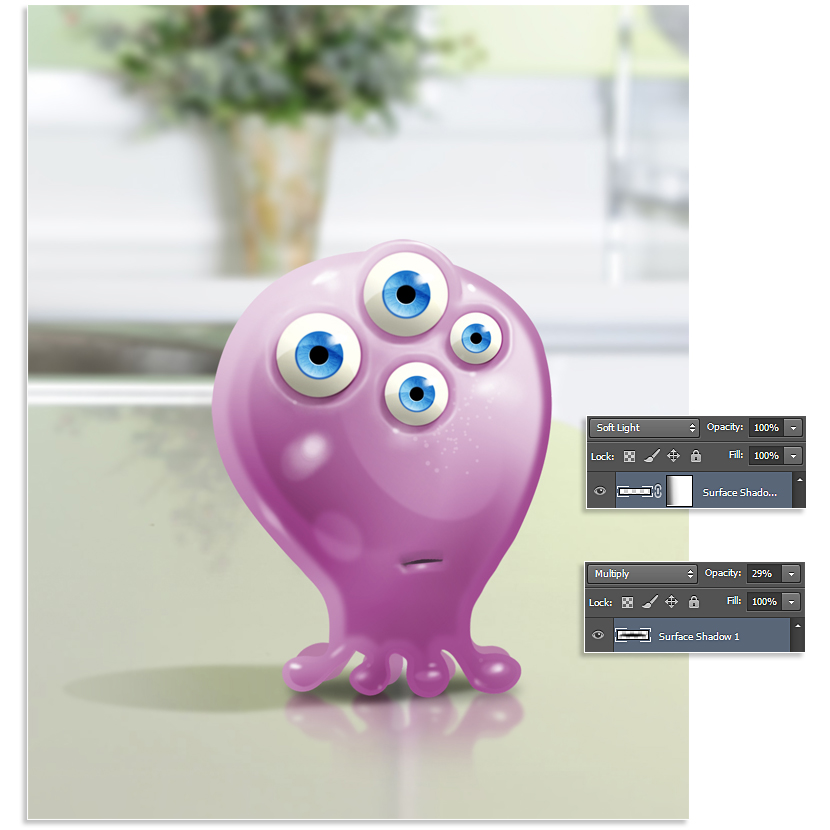
For the shadows that the character casts, create two layers, first one, is for the shadow placed just below it, “Surface Shadow 1”. Set its Blending Mode to Multiply and 29% Opacity, with the Elliptical Marquee Tool (M) make an elliptical selection and, with the Paint Bucket Tool (G), fill it with black color, next, go to Filters > Blur > Gaussian Blur and blur it at taste. The second one, shadow that He projects on the surface, “Surface Shadow 2”. Set its Blending Mode to Soft Light and 100% Opacity, repeat same technique as before with the Elliptical Marquee Tool (M) and black color. Part of the shadow that is further from the character is weaker, so, to achieve that effect, apply a Layer Mask and with the Gradient Tool (G), and low Opacity set, fade that area.
Step 23
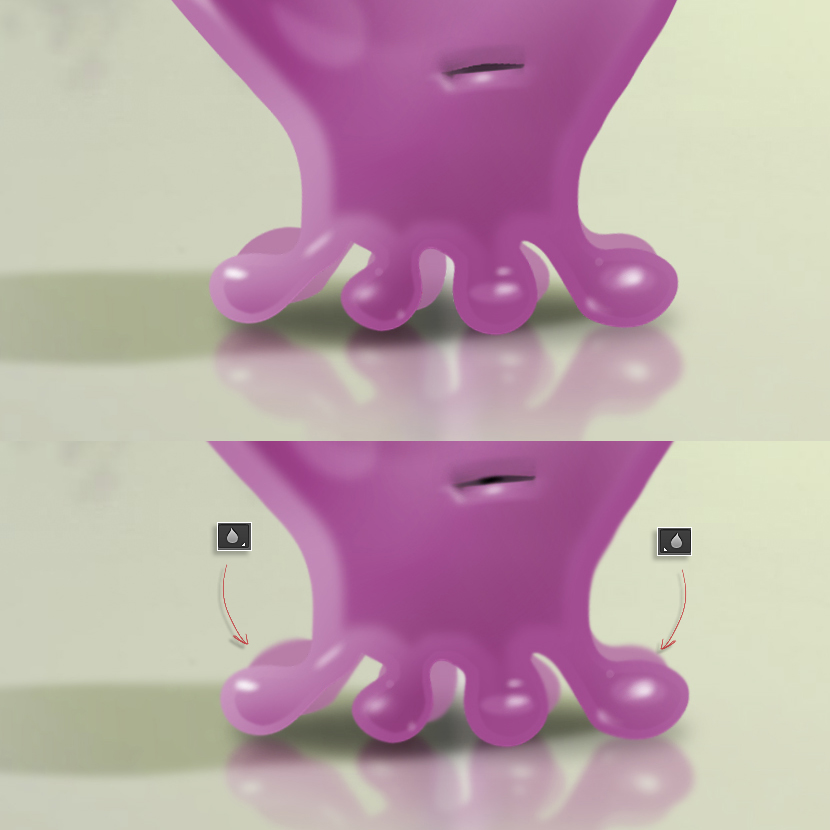
Following with the character’s integration, using the Blur Tool, blur the further legs to add some depth.
Step 24
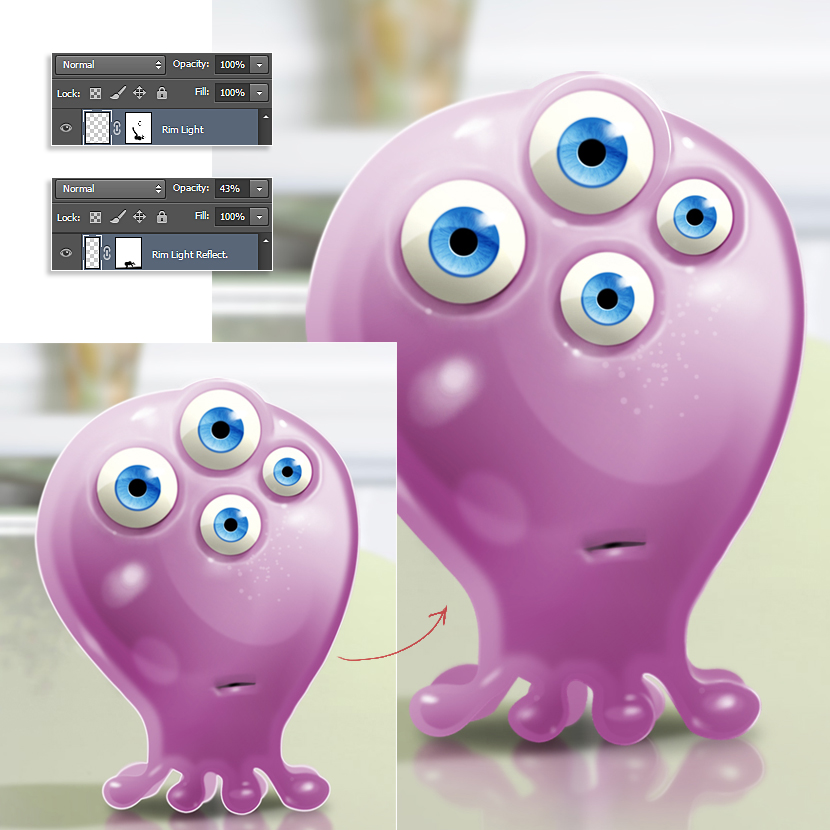
The light, normally illuminates the contour of the objects, to achieve it on our character, create a new layer “Rim Light”, set its Blending Mode to Normal and 100% Opacity. Make Ctrl + Click on the character’s layer to create its selection, now go to Edit > Stroke, and make a 2 pixels white external stroke, with the Blur Tool, blur it a bit. Apply a Layer Mask and hide the areas where light doesn’t reach the character. That contour must be also on the surface’s reflection, so Copy and Paste the previous layer, go to Edit > Transform > Flip Vertical and fit it on the reflection, then set its Opacity to 43%
Step 25
Light bounces and incides again on the objects, to achieve that effect create a new layer “Bounced Light 1”, set its Blending Mode to Color and 40% Opacity. Witht the Color Picker, select the surface’s color, and picking the Gradient Tool (G), set with low Opacity, make a gradient on the body from left to right. For the lower part, create another layer, “Bounced Light 2”, set its Blending Mode to Normal and 25% Opacity and make a new gradient over it. to avoid staining the background with the gradients, select the body’s shape before making them.

Step 26
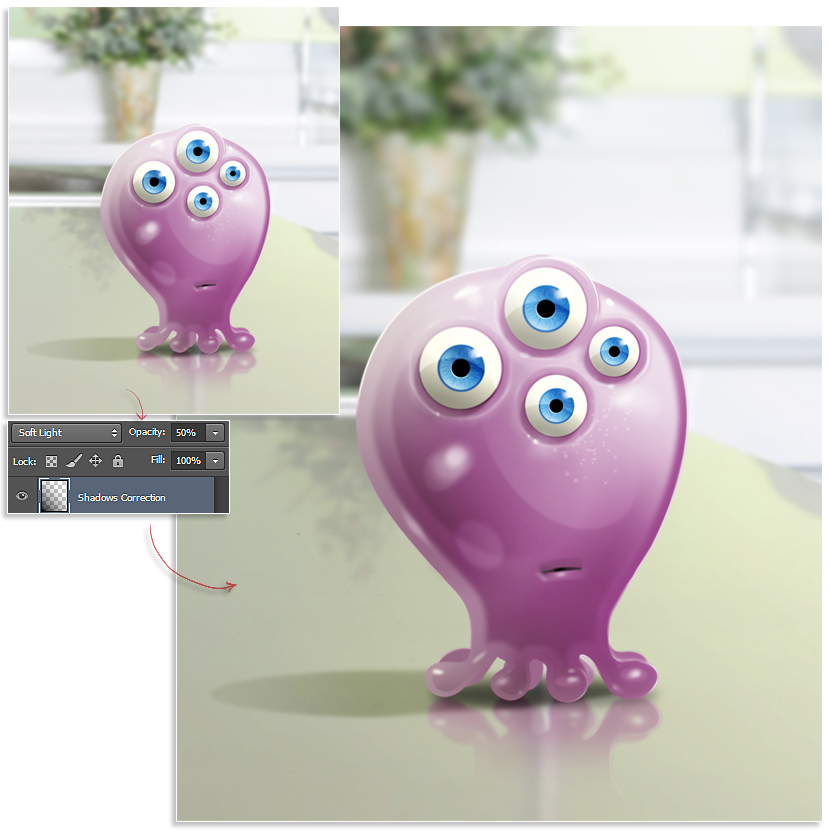
To create more balance on the shadows, create a new Layer “Shadows Correction”, set its Blending Mode to Soft Light and 50% Opacity, then, picking the Gradient Tool (G), and black color, make a gradient from lower left side to upper right.
Step 27
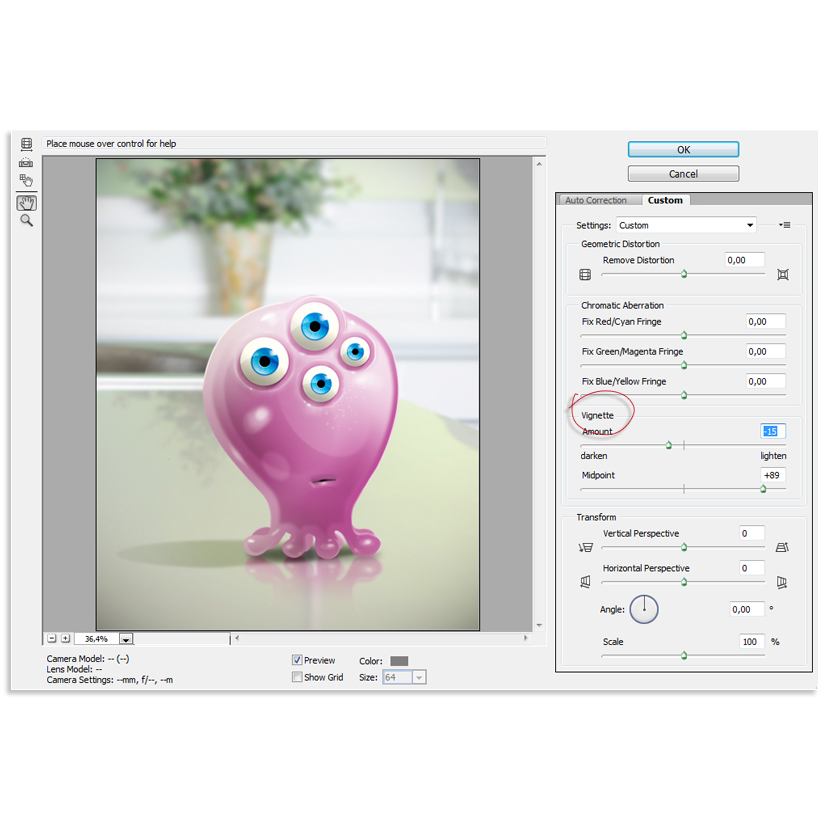
Now we have the character completely integrated on the background, so, duplicate and merge the previous layers to get the final image. To add some vignetting on the image, go to Filters > Lens Correction, and on the Custom tab you will find its settings, a quantity of -15 will be ok.
Step 28
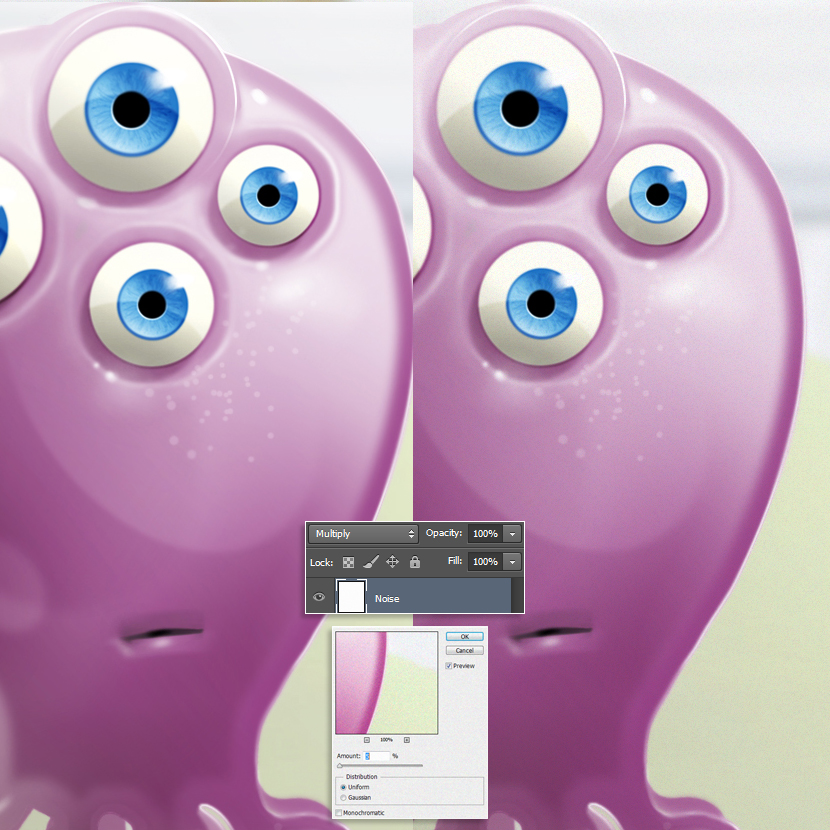
Finally, I like to add some noise to my images, create a new Layer, set its Blending Mode to Multiply and 100% Opacity. With the Paint Bucket Tool, fill it with white color, and go to Filters > Noise > Add Noise, a quantity of 5% will be enough.
Step 29
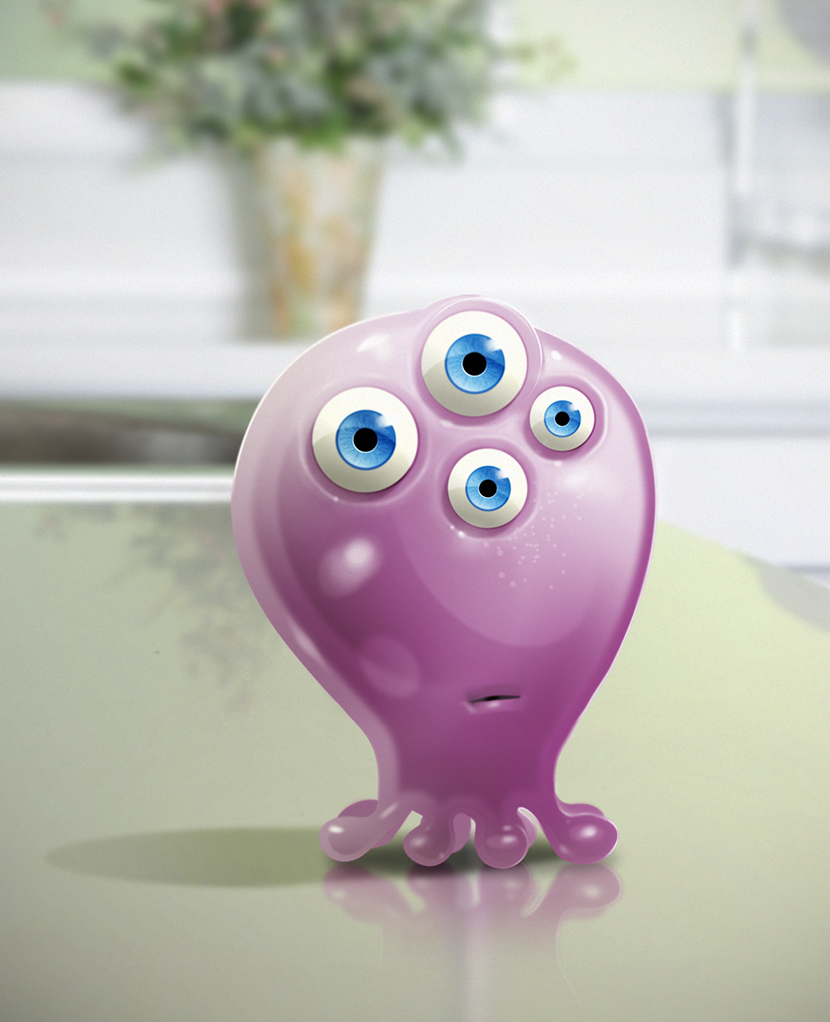
Here we have our buddy caught by surprise while was taking a walk by the kitchen looking for some tasty things…