 Members Area Tutorial: Photo Manipulate a Floating, Burning Stone Monument
 Create a Smoke Text Effect Using Photoshop’s Non-Destructive Tools
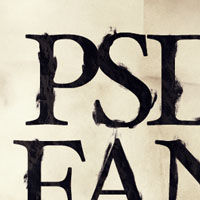
 Members Area Tutorial: Design a Multi-Page Portfolio Website
Have every post delivered to your inbox and get access to hundreds of useful design freebies.
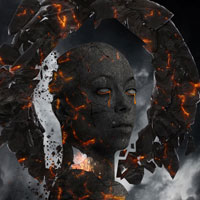
As always, this is the final image that we’ll be creating:

Create a new document (600X600px) and fill your canvas with this old paper texture:

Now go to image>adjustments>hue/saturation and reduce your saturation to -60 and your lightness to +50.

Now type out some large text in the center of your canvas. I went with Hoefler Text, 192pt, -100 kerning.

Now download this great image of some fingerprints:
Then go to image>adjustments>desaturate to grayscale your fingerprints image.
Go to image>adjustments>levels and use the settings shown below in order to darken your fingerprints.
Then finally go to select>color range and use the settings shown below. Select the ‘sampled colors’ option, and then hit OK. This should select all of your fingerprint shapes.


Ok, so now you have all of your fingerprint shapes selected. Copy/paste them onto a new layer, so that you can easily grab each fingerprint at will to use in your main composition.
Return to your main document, and start paste in your fingerprint shapes to the outside of your letters. Be sure to paste each fingerprint onto a layer BELOW your type layer.
If needed, resize, transform and rotate your fingerprints in order to fit better to the edges of your letters.
Once you’ve added enough fingerprints, merge down your type layer with all fingerprint layers, until you’re left with a single layer containing your newly distorted type:


Now paste this image into your document, resize it to fit your canvas:
Then go to layer>create clipping mask. This will make your texture be masked off to fit the data on the layer beneath it (in this case our text). Then reduce your rock texture layer’s opacity to around 15%.


Now create a new layer called ‘clouds’. Go to filter>render>clouds.
Then change this layer’s blend mode to ‘overlay’.


Now paste in your original fingerprint shapes, spacing them nicely over your canvas. Reduce the opacity of each one to between 10-40%.

Now apply a gradient overlay adjustment layer (see settings below). Be sure to reduce the opacity of this layer to around 5% to keep the effect very subtle:

You can view the final outcome below. I hope that you enjoyed this tutorial and would love to hear your feedback on the techniques and outcome:

Tom is the founder of PSDFAN. He loves writing tutorials, learning more about design and interacting with the community. On a more interesting note he can also play guitar hero drunk with his teeth.


Do you know the basic tools in Photoshop but feel that your work is still looking average? Join our creative community at FanExtra and get the direction you need to take your work to the next level.


Really nice technique, sometime things can look to clean on a site and this is a nice way of making something look more mixed media. I will experiment with this one in the future.
Awesome tutorial!! The finished piece looks great, looking forward to trying it out!!
Thanks.
Very nice tutorial. Thanks for sharing the effect the typography has is really impressive.
Great tutorial and a really nice result. I really like the techniques you’ve use to achieve the finished image.I will definitely have to try this out sometime and see what I can come up with.
In a word it’s a perfect tutorial!
everything is clear and steps are easy to follow. Thanks!
Can somebody help me with step 4 please!
Hey Kelsey. If you do a quick Google of ‘Photoshop color range selection’ it should help explain things for you. It’s just a basic extraction technique you can use by selected based on color data (in this case, the white background).
Typographical Style is very new for me. I can share Typographic. its can be impressive and interesting learn for user. Thank for new blog.