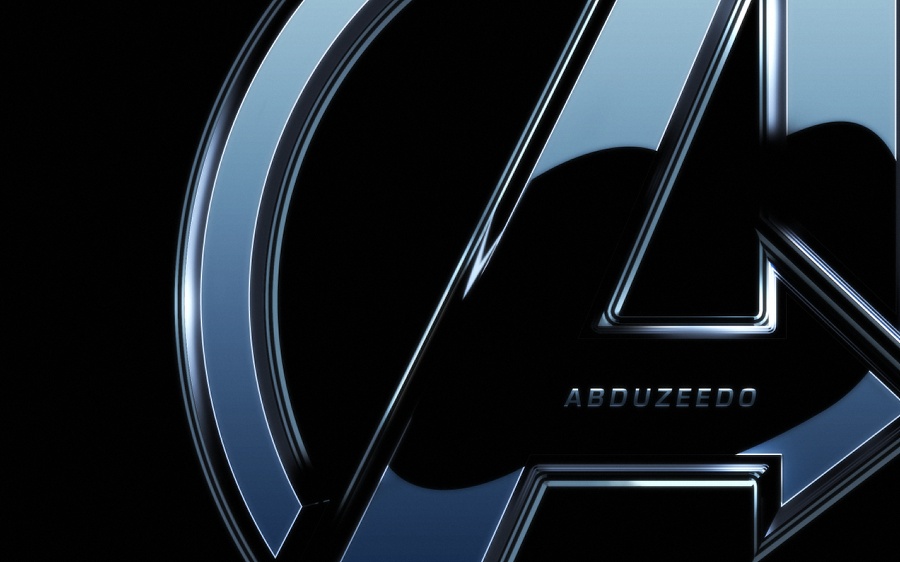
Super Bowl is always a great time to see some nice movie trailers and previews. One that caught my attention was for the new The Avengers movie. I am looking forward to watching this movie but I also was looking forward to trying to recreate that poster in Photoshop.
So in this tutorial we will show you how to create the shine effect of The Avengers poster using only Photoshop. We will pretty much play only with Layer Styles and the Brush Tool (B).
Step 1
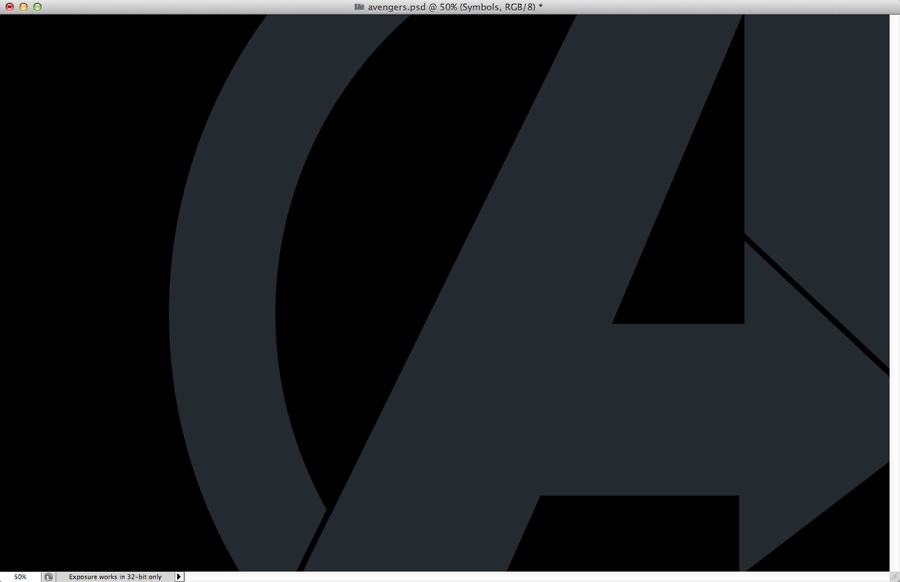
First thing to do is to find the Avengers logo. Just search on Google and you will find a vector version. Then in Illustrator you will have to create 2 new versions using the Object>Path>Offset Path. Use negative value for the offset. I used 2mm for both inner and outer versions.

Step 2
Copy one by one from Illustrator to Photoshop so you will have 3 layers, inner, middle and outer. Hide the inner and middle and let's start creating the effect with the outer shape.
Step 3
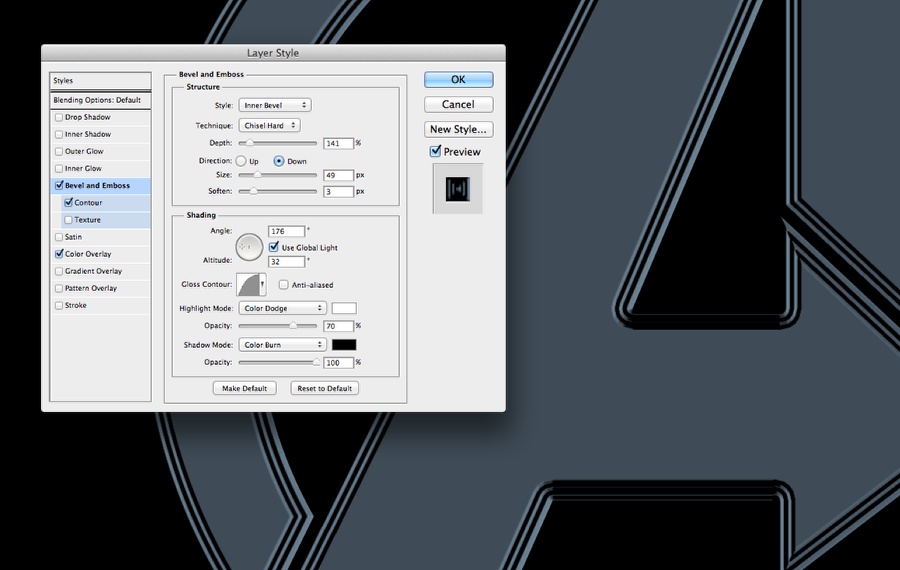
Go to Layer>Layert Style>Bevel and Emboss. Use Inner Bevel for the Style, Chisel Hard for the Technique, 140% for the Depth, 50 pixels for the Size, 3 for the Soften. For the Shading use 175º, 32º Altitude and for the Gloss Contour use the same I am using in the image below. Also change the Highlight Mode to Color Dodge with white for the color at 70% Opacity. For the Shadow Mode use Color Burn with black for the color at 100% Opacity.
After that select Color Overlay. Use #32333a for the color.
Step 4
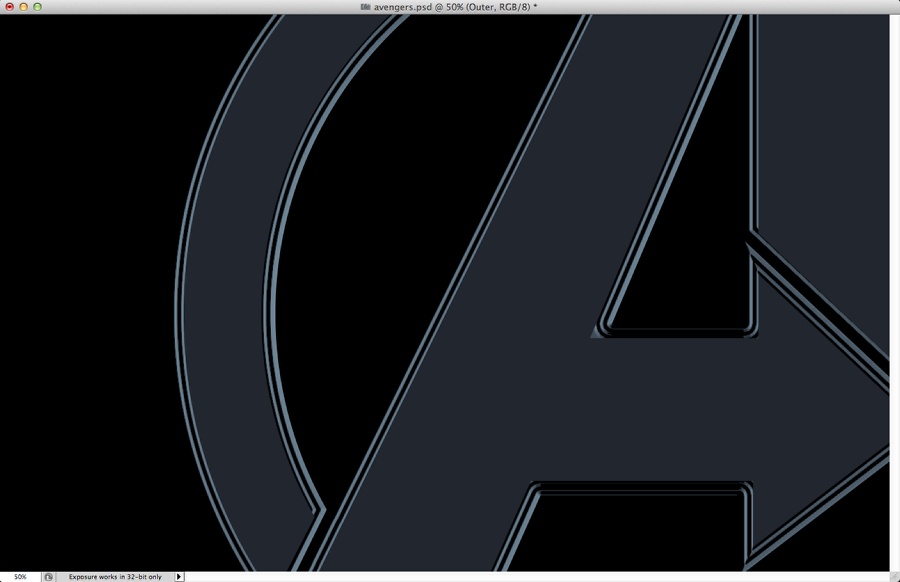
Make the middle symbol visible again and duplicate it. Hide the duplicated version for now.
Step 5
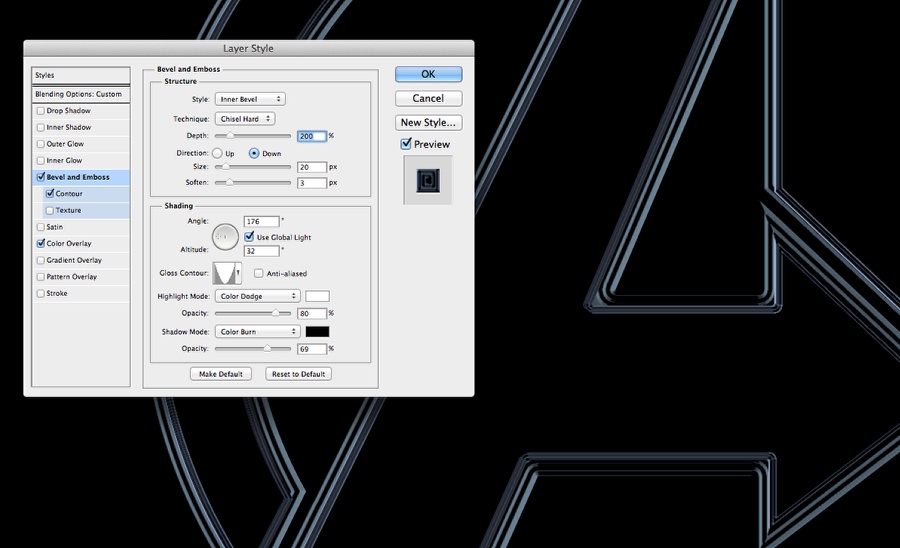
With the middle version selected go to Layer>Layer Styles>Bevel and Emboss. Use Inner Bevel for the Style, Chisel Hard for the Technique, 200% for the Depth, 20 pixels for the Size, 3 pixels for the Soften. Then for the Shading use 175º for the Angle, 32º for the Altitude. Then for the Gloss Contour use the same as the image below. For the Highlight Mode use Color Dodge with white for the color at 80% and for the Shadow Mode use Color Burn with black for the color at 70%.
For the Color Overlay use the same as the previous step.
Step 6
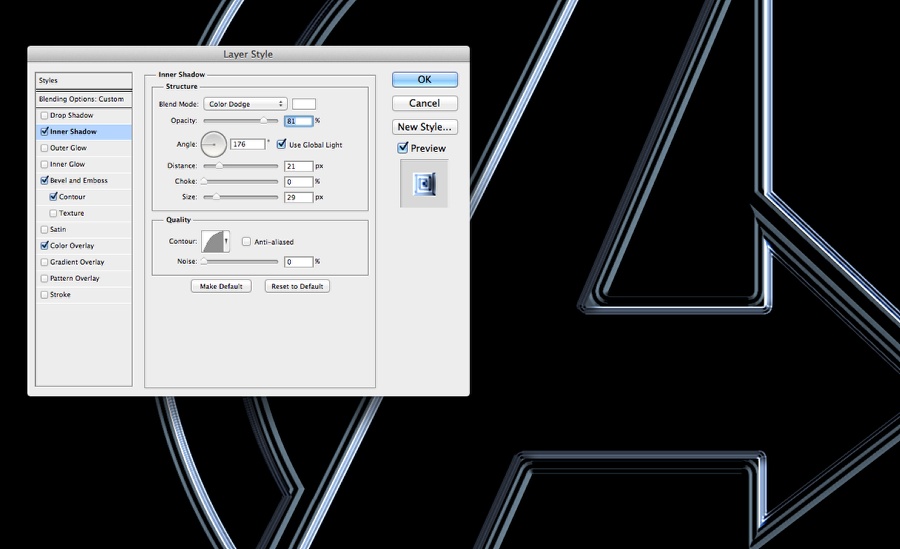
Go to Layer>Layer Style>Inner Shadow and then use Color Dodge for the Blend Mode with white for the color. For the Opacity use 80%, for the Angle use 175%, for the Distance use 20 pixels and for the Size use 30 pixels.
Step 7
Make the duplicated layer visible again and apply the same inner shadow as the previous step. Also for the color overlay use #21262f.
Step 8
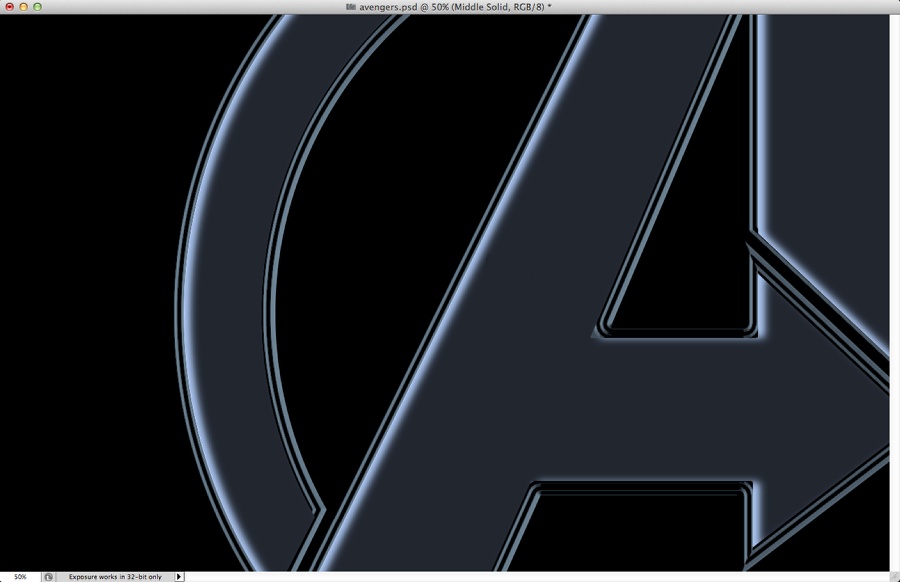
Make the inner symbol layer visible. Then go to Layer>Layer Style>Gradient Overlay. Use #031532 for the darker color and #a4c2d6 for the lighter.
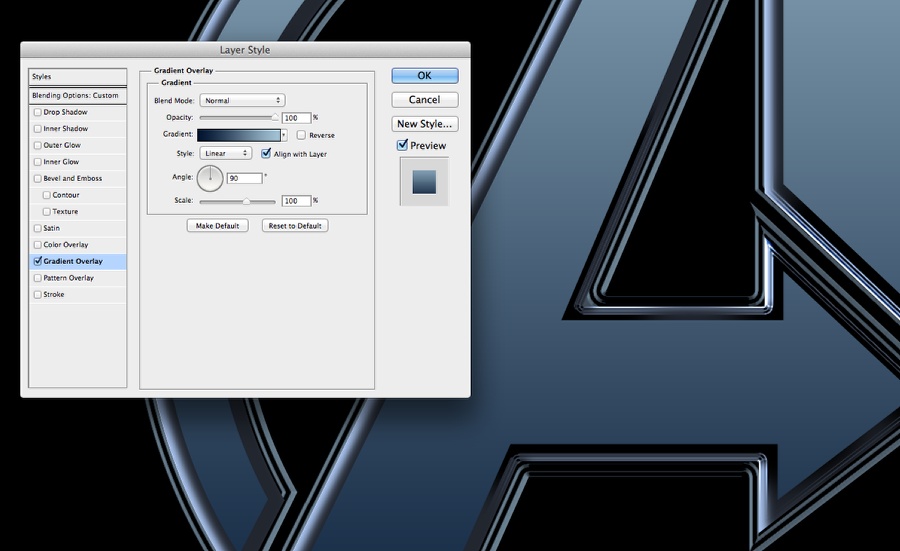
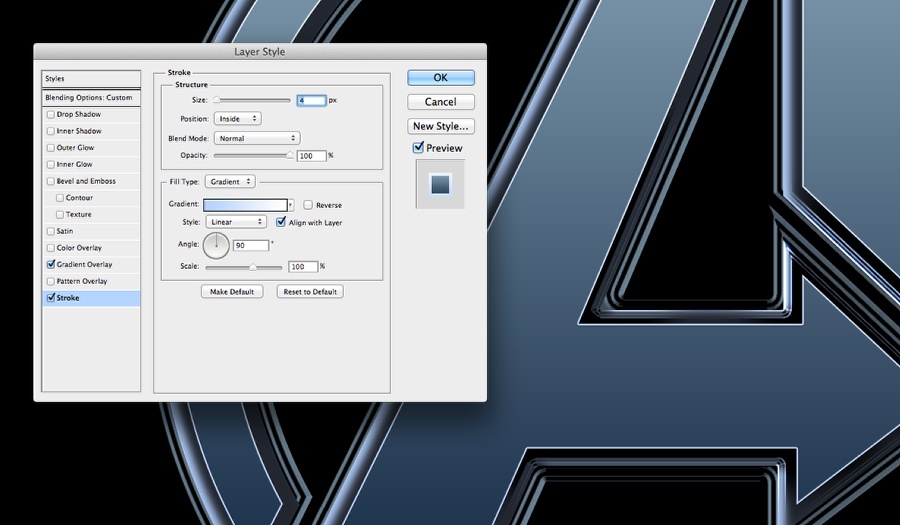
Step 9
Select Stroke and then use a gradient from light blue to white with 4 pixels for the size and inside for the position.
Step 10
Now it's time to add the shine effects. That is quite simple it's pretty much basic shapes masked. In this step just create 3 black ellipses and maske them so they will be visible only on top of the inner symbol
Step 11
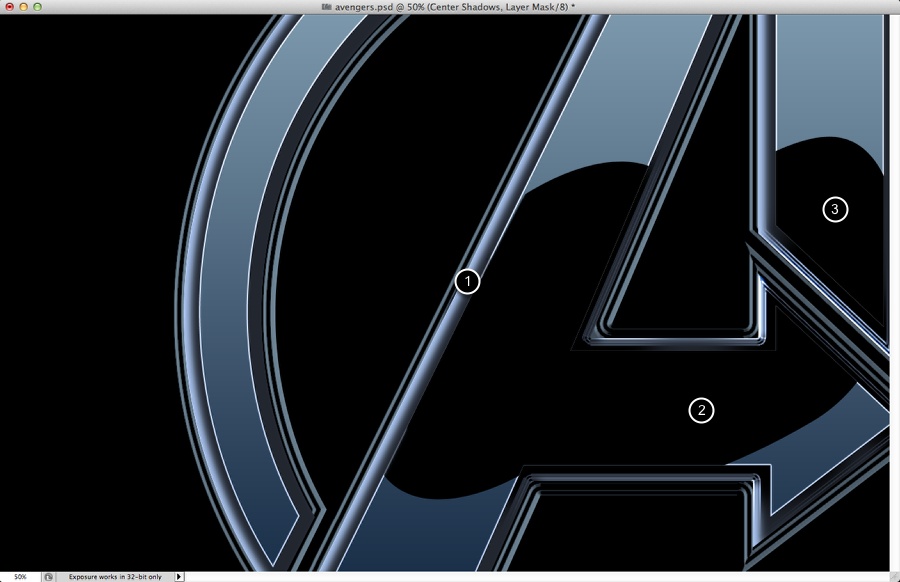
Now add a new layer on top of the others and start painting some shadows using the Brush Tool (B) with black for the color. Note that this shadows only apply for the middle and outer symbols. Also note that some areas it the shadow gets blurry. You can do that by either using a soft brush or using the Blur Tool.
Step 12
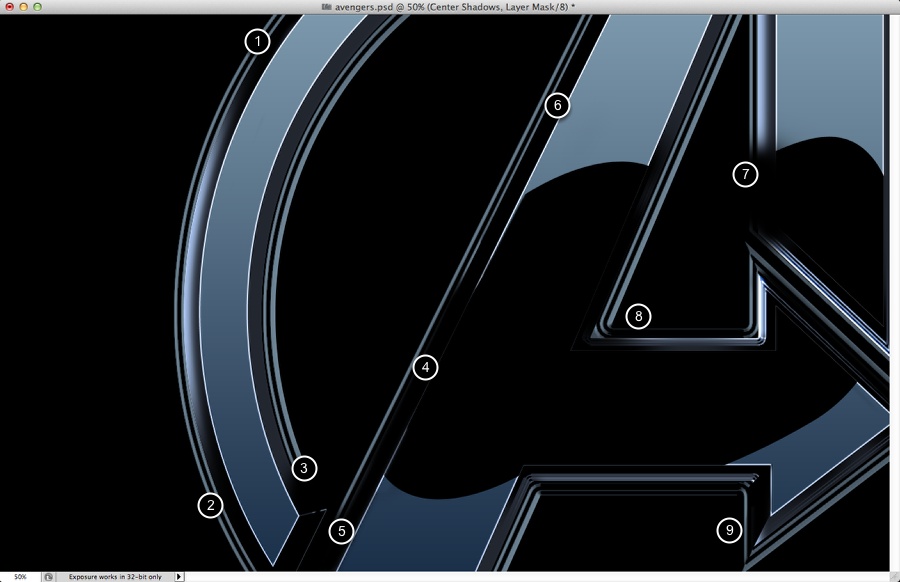
Add a new layer and group it into a folder. Change the Blend Mode of the folder to Color Dodge. Select the layer and then with the Brush Tool and white for the color paint some highlights (1-5)
Step 13
Add some new hightlights if necessary, in this case I highlighted the bottom part of the arrow (1-2).
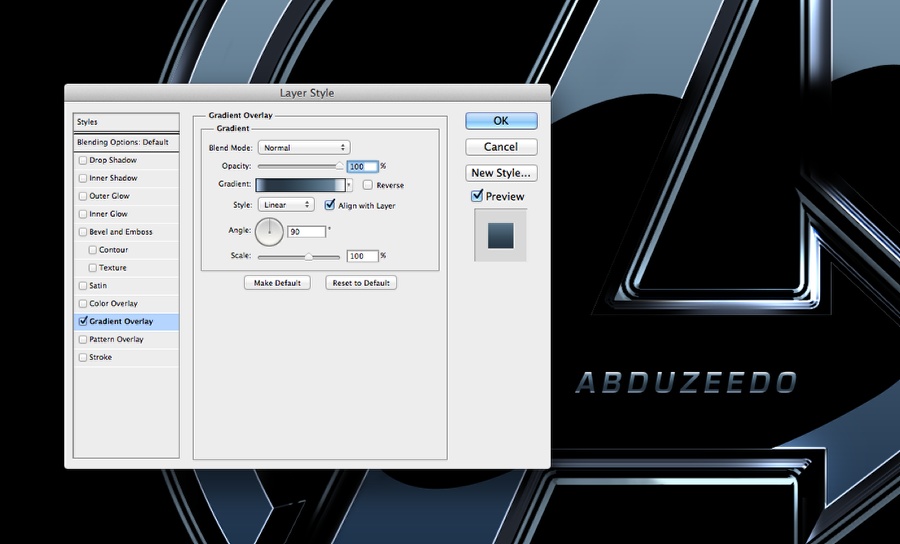
Step 14
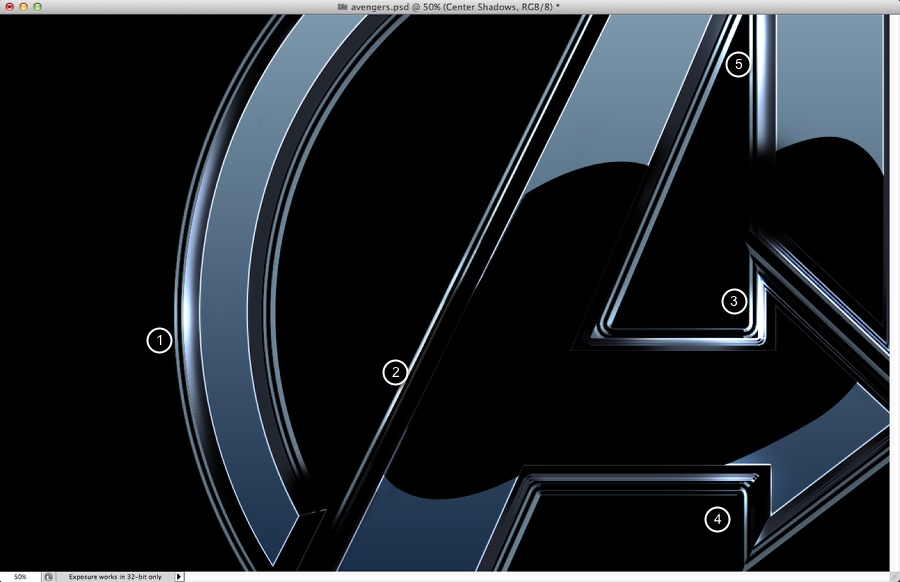
Add the text you want using the Text Tool (T) and then using layer styles apply a linear gradient like the image below.
Conclusion
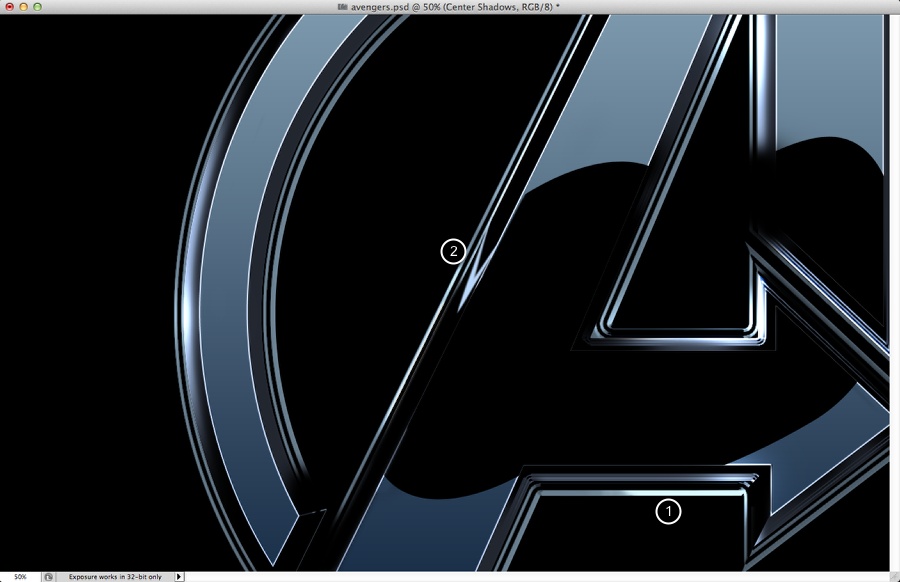
Select all layers and duplicated them, them merge all the layers into one. Go to Fitler>Blur>Gaussian Blur. Use 10 for the radius. Change the Blend Mode to Overlay at 50%. Duplicate this layer and change the Blend Mode to Screen. The last thing here is to duplicate all the layers again and merge them into one so you can add some noise to the image.
The design is quite simple as you can see and this was just an exercise. There's still quite a few fine tunes to be made, especially the contours. But now it's up to you.
Download the Photoshop file


