
This tutorial will show you a simple way to create the illusion of flower blossoms using selections, work paths, and simple brushes with a couple of different blend modes and layer styles.
Tutorial Assets
1-Wood panel texture by ~plastikmaniac
2-Leaf Silhouettes Free Brush Pack by stock_graphic_designs
3-Lane font
Step 1
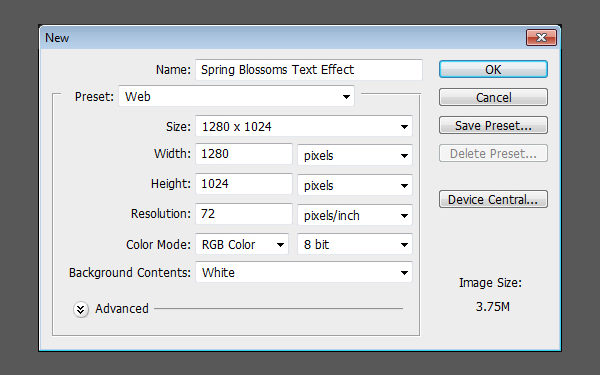
Create a new 1280 x 1024 px document. You can enter different values for the width and height depending on the text you’ll be creating.

Place the “Wood panel texture” on top of the Background layer, then go to Image > Adjustments > Hue/Saturation, and change the Saturation value to -100.

Go to Image > Adjustments > Levels, and change the Gamma value to 0.50 to darken the image. It is important to have a quite dark background for this text effect.

Step 2
Create the text in All Caps using the color White, and the font Lane Narrow. The font size is 255 pt, and the Tracking value is set to 200 to avoid overlapping later on.

Double click the text layer to apply the following Layer Style:
1. Drop Shadow: Just use the default values.

2. Color Overlay: Set the color to #1f0615.

3. Stroke: Change the Size to 30 and the Color to # 1f0615.

This is what the text should look like. It’s thicker and darker, and this will be the base for the other elements that will be added later on to create the final text effect.

Step 3
Next, we are going to create the blossoms brush. So create a new 300 x 300 px document with a White background.

Set the Foreground color to Black, pick the Ellipse Tool, and make sure that the “Shape layers” icon is clicked in the Options bar. Then, create an ellipse in the upper half of the document. The ellipse created here is 77 x 111 px, you can check the dimensions in the Info panel (Window > Info) while you’re creating the ellipse.

Double click the ellipse shape layer to apply a Gradient Overlay effect. Click the Gradient box to create the gradient using the colors #ffffff and #8c8c8c. Then, change the Style to Radial and the Scale to 130.

Duplicate the shape layer, then go to Edit > Transform > Rotate.

Rotate the copy shape layer around 40° to 45° clockwise (you can check the Rotate angle in the Options bar). Then press Enter/Return to accept the changes.

Continue duplicating and rotating the ellipse shape layers until you get a flower-like shape. You can as well change the order of the ellipse shape layers as you like. Once you’re done click the Background layer, then go to Edit > Define Brush Preset, and type in a name for the brush then click OK.

Go back to the original document, pick the Brush tool, and choose the brush you’ve just created (it will be down the Brush Preset picker in the Options bar). Then, open the Brush panel (Window > Brush) and modify the settings as shown below:
1. Brush Tip Shape:

2. Shape Dynamics:

3. Scattering:

4. Color Dynamics:

Step 4
Set the Foreground color to #f26d7d and the Background color to #f2f0c7, pick the Direct Selection Tool, and Right-click/ Control-click the text layer then choose Create Work Path.

Create a new layer on top of the text layer and call it “Blossoms 1”, then Right-click/ Control-click the work path and choose Stroke Path.

Choose Brush from the Tool drop down menu and make sure that the Simulate Pressure box is un-checked, then press OK. This will stroke the path with the brush you created and modified. Hit Enter/Return to get rid of the work path.

Duplicate the “Blossoms 1” layer and change the copy’s Blend Mode to Linear Dodge (Add), then duplicate the copy and change the second copy’s Blend Mode to Overlay.

Double click the “Blossoms 1” layer to apply a simple Drop Shadow effect using the default values.

Change the “Blossoms 1” Fill value to 0%, then select all the “Blossoms 1” layers , group them (press Ctrl/Command + G), and rename the group to “Blossoms 1”.

Step 5
Ctrl/Command + click the text layer’s thumbnail (icon) to create a selection, then go to Select > Modify > Expand, and type 10 in the “Expand By:” box. This will expand the selection 10 px outwards.

Next, open the Paths panel (Window > Paths), press the Alt/Option key, click the “Make work path from selection” icon down the Paths panel, and set the Tolerance value to 1.0. This will convert the selection to a work path. (A low Tolerance value means more anchor points and a more accurate conversion).

Create a new layer right below the “Blossoms 1” group, call it “Blossoms 2”, and stroke the new path just like you did previously.

Duplicate the “Blossoms 2” layer twice and change the first copy’s Blend Mode to “Linear dodge (Add), and the second copy’s Blend Mode to “Overlay”, then change the “Blossoms 2” layer’s Fill value to 0, apply a Drop Shadow effect using the default values, and group the “Blossoms 2” layers in a “Blossoms 2” group. Just like you did with the “Blossoms 1” layers.

Step 6
Choose a soft round brush and open the Brush panel to modify its settings as shown below:
1. Brush Tip Shape:

2. Shape Dynamics:

3. Scattering:

4. Color Dynamics:

Create a work path from the text layer, create a new layer on top of all layers and call it “Pollen”, and change its Blend Mode to Overlay. Then, set the Foreground color to #fff200 and the Background color to #f7941d, and stroke the path.

Step 7
Ctrl/Command + click the text layer’s thumbnail to create a selection, then go to Select > Modify > Expand, and type 20 this time.

Alt/Option + click the “Make work path from selection” icon down the Paths panel.

Open the Brush panel, choose the brush shown below from the “Leaf Silhouettes Free Brush Pack” (after you load the brushes), and modify the brush settings as shown below:
1. Brush Tip Shape:

2. Shape Dynamics:

3. Color Dynamics:

4. Transfer:

Set the Foreground color to #8dc63f and the Background color to #406618, create a new layer below the “Blossoms” groups and on top of the text layer and call it “Leaves”, then stroke the path with the leaf brush you modified.

Go to Image > Adjustments > Levels, and change the Gamma value to 0.75.

Go to Image > Adjustments > Hue/Saturation, and change the Saturation value to -10, and the Lightness value to -10 as well.

Finally, add a Drop Shadow effect using the default values to the “Leaves” layer, and you’re done.
(click for larger image)

While the final effect seems to have many flowers placed all over the text, it’s actually really simple and quick once you create the brush and adjust its settings. Hope you enjoyed the tutorial and found it useful.
